

Have you accidentally deleted essential images from your computer? This is a particularly distressing issue for individuals who didn’t back up their data and had no idea how to get deleted pictures back. Fortunately, there are some methods to recover deleted photos. All you have to do is to be quick in whatever method (explained below) you select.
These photos can’t be readily deleted from your computer because the system considers them reusable files. They’ll be overwritten. Before these are overwritten, you can restore photos and save them somewhere. In this post, we will introduce some methods on how to recover permanently deleted photos. with or without software. Let’s discuss both options
How to Recover Permanently Deleted Photos from Windows Without the Software?
Any Windows user can use one of two reliable methods for photo recovery. If you aren’t already familiar with these methods, you should do so now to get your pictures back in no time!
Method 1: Recover deleted photos via the Recycle Bin
Recovering photos from the Recycle Bin could be the least complicated option. All files you remove from your Windows PC will be kept in the recycle bin. Until you empty the folder manually, the files remain inside.
- Open Recycle Bin.
- Find deleted photos by scrolling. For faster search, filter files by deletion date and time.
- Right-click each photo and choose Restore photo. The images are returned to their original folder. You may alternatively select all the needed pictures and click ‘Restore Selected Items’ under Manage. ‘Restore All Items’ restores photos you deleted.
- Open the photographs’ original location to see if they were restored.
Method 2: Get deleted pictures back using Backup
Windows Backup & Utility tool can recover deleted photos. This feature only works for Windows users with backups. Photo recovery with Backup & Utility:
- Open Backup & Utility in Windows.
- Choose ‘Restore File History.’
- Use the display arrows to examine all file versions when searching for images.
- When you find the photographs, pick Restore to save them to their original location. Click ‘Restore to’ and select a folder or create a new one to save it somewhere.
Method 3: The easiest way to recover permanently deleted photos/videos is using data recovery software
When the Recycle Bin is empty and you can’t find a copy of a deleted photo in a backup, you can bring it back with the help of Recoverit Photo Recovery software.
Based on the feedback of previous readers and the available capabilities, we have decided to use Recoverit photo recovery. Wondershare Recoverit can scan the disc and retrieve the permanently deleted photos when previous approaches have failed.
Here is a step-by-step guide on how to get back deleted pictures.
Step 1: Install and Launch Recoverit on your PC or Mac
Input system-level credentials whenever the software during installation requests them.
This means that it can make any necessary system adjustments in preparation for recovery. Unless you instruct the image recovery utility to do so, it will not alter your computer.
Step 2: Select Drive and search deleted photos
When you launch Recoverit, you’ll get a list of all the discs that can be recovered. Pick the one you want to scan and select the scan type from the menus supplied.

You can choose via File Date, File Path, File Size, etc. To quickly locate the deleted photos, you can also filter by keywords.
Step 3: Preview Photos you want to recover
You can pause the scan at any time or let it finish automatically. At this point, you can pick and choose whatever photos you want to restore.
You can see a preview of the photographs before attempting a recovery to be sure you’re getting back the right ones.

Scanning results in Recoverit can be filtered, making it easier to find your missing photos.
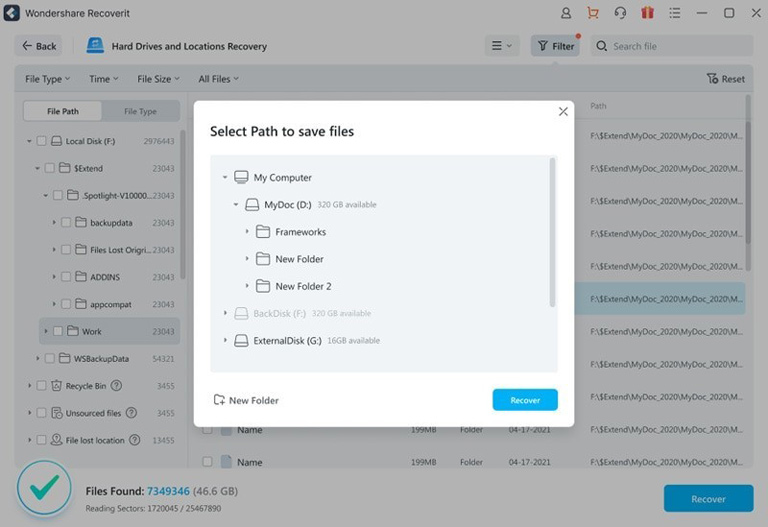
Step 4: Restore Photos using the Recoverit Photo recovery tool
If the deleted photos were stored on the same disc as the data you are recovering, you would want to move them to a different location.
This will safeguard the files during recovery, ensuring they are not accidentally overwritten or corrupted. Once you’ve located a safe place, you should wait until the recovery process is complete before proceeding.
Why should you use Recoverit photo recovery?
After knowing how to get deleted pictures back using Recoverit photo recovery, you may wonder why Recoverit.
- Recover 1000 formats of files: Photos, videos, and audio, documents, among others, can all be recovered.
- Recover lost data in all conditions: Recovers information in the event of any data loss scenario, such as empty trash, an unintentional deletion, a disc format, the loss of a partition, the corruption of an external device, a virus attack, a system crash, bootable issues, and so on.
- Support 2000+ storage devices: Recovers Data from Hard Drive, Solid State Drive, RAID, USB Drive, Micro Card, Memory Card, Laptop, Desktop, Camera, Camcorder, External Disk, Video Player, iPod, SD Card, Zip Drive, Pen Drive, Floppy Disk, Mobile Phone, and More!
- Free to use: Recoverit allows you to scan lost or deleted data for free. By doing this, you can check what data can be restored. You won’t be charged if you fail to get back your data.
How to avoid photo loss?
- When removing a memory card or other detachable device from a computer, use “safely remove hardware.” Otherwise, the OS may not have time to handle data effectively.
- For the same reasons as before, don’t expel an available memory card.
- Charge batteries regularly. If the battery dies incorrectly, the memory card may fail. Card readers don’t have these issues. Hence they’re preferable for transfers.
- Transfer photographs frequently. By doing so, you’ll lose only your recent images, not a year’s worth.
Conclusion
Establish a schedule where you regularly back up your device’s data. All the images you have successfully recovered will be stored on your computer as a precaution against future data loss. However, with Wondershare Recoverit Photo recovery on your PC or Mac, you have nothing to worry about, as it can restore photos even if you haven’t backed them up.
Leave a comment
Have something to say about this article? Add your comment and start the discussion.